This cheat's ice cream is the best way I know to use up overripe bananas. It's not quite instant but it involves very little work, has only one ingredient and tastes amazing.
Ice cream is one of those things I always have in the freezer as I don't make puddings unless I have guests or some fruit to use up. It has to be premium ice cream for me and a small bowlful is plenty to satisfy any cravings I have for fat and sugar. Bananas have both without the need to add any extras and the simplicity of this does away with hours of making a custard base, churning and rechurning.You don't need an ice cream machine either, just a food processor.
I've been making this for so long that I have no idea where I originally discovered this. A friend who knows about such things explained the science to me - namely, that when bananas are frozen the fat they contain undergoes some kind of transformation and blitzing it produces the same creamy texture you get in proper ice cream. Whatever - it works!
What you need:
4-6 very ripe bananas
What to do:
Peel the bananas and slice into 1cm rounds, discarding any blackened or badly bruised flesh. Spread the slices on a baking sheet and pop in the freezer for about an hour - they should be three-quarters frozen, not solid.
Put the three-quarters frozen banana slices into a food processor and blitz them until smooth. Put into a suitable container and refreeze. This makes about a pint / 1/2 litre depending on the size of the bananas.
Cook's tips:
It's really important that you don't over-freeze the banana - blitzing it fully frozen could burn out the motor in your food processor. If the slices have frozen solid, leave them to soften a bit before processing.
This freezes rock hard once blitzed and refrozen so take it out of the freezer for 10-15 minutes to soften slightly before scooping a portion.
Extras - you can, of course, add extra ingredients once you've pulped the banana flesh. Things I've tried that work well include chocolate chips, dessicated coconut, chopped nuts (pistachios, brazils and walnuts are especially good), candied peel. and chopped glacé cherries. For an even creamier texture you could stir through some double cream or Greek yoghurt after processing. Beware of using crème fraiche as it can split when it thaws.
As far as I know this will keep indefinitely, although it's never lasted long enough for me to find out!
Thursday, 20 December 2012
Thursday, 13 December 2012
Book review: Quick and Easy Indian Cookbook
It's very rare for me to cook curry at home, as I've said before. So when I was asked to try out the Quick and Easy Indian Cookbook by the Three Sisters, I took as a good opportunity to increase my somewhat basic knowledge.
Despite the title, prepping the various spice mixes was time-consuming. The ginger and garlic paste used in many recipes took me half an hour to make, most of that peeling the garlic cloves. However, it made a generous quantity that can be kept in the fridge or frozen in ice trays and it's the kind of thing I would use for non-Indian dishes too, so I didn't mind. Likewise, toasting and grinding spices before the cooking could begin - I spent 30 minutes preparing the chaat masala spice mix (which is used in many of the book's other dishes). The recipes themselves were mostly fairly straightforward once everything was prepped, although a major challenge for me was working out how to cut down recipes intended for 4 or 6 people into 1 or 2 portions.
I was wary of the chopped green chilli in the Cumin Chicken as I don't like fierce heat, but I needn't have worried. The finished dish was warm and fragrant rather than searing although mine looked rather wetter than the book's photo of it. I made a little tomato and cucumber raita to go with it (not in the book).
The book gives a recipe for making paneer but my kitchen doesn't have the space for setting cheese curds aside to drain so I bought some from an Asian supermarket and cooked two recipes. The shahi paneer, or royal Indian cheese, was a fragrant tomatoey casserole that turned the paneer into very soft curds. The shallow-fried paneer chaat really was quick and easy. I will definitely make both these again.
The gosht boti (lamb chops with tomato) were a disappointment, tasting very bland despite the large number of spices. The instructions were also a baffling mess - during the browning of the meat it says to boil off the water, except the water gets added much later.
The Goan fish curry, which I made with king prawns, really hit the mark. Packed with ginger, garlic and chilli and softened with the coconut milk, it soothed the cold I was suffering from. Despite the long list of ingredients, it was simple to assemble and tasted amazing. And it was easy enough that I'd feel confident cooking it without the book on front of me.
All in all, it's definitely a book I'd cook from again especially if I had guests. A big downside is that too many recipes need you to toast whole spices then grind them as part of the cooking rather than something you can do ahead in quantity - that belies the claim of quickness. I've still got a few bookmarked recipes to try and of the five above, I'd make all of them again except the lamb chops.
Despite the title, prepping the various spice mixes was time-consuming. The ginger and garlic paste used in many recipes took me half an hour to make, most of that peeling the garlic cloves. However, it made a generous quantity that can be kept in the fridge or frozen in ice trays and it's the kind of thing I would use for non-Indian dishes too, so I didn't mind. Likewise, toasting and grinding spices before the cooking could begin - I spent 30 minutes preparing the chaat masala spice mix (which is used in many of the book's other dishes). The recipes themselves were mostly fairly straightforward once everything was prepped, although a major challenge for me was working out how to cut down recipes intended for 4 or 6 people into 1 or 2 portions.
I was wary of the chopped green chilli in the Cumin Chicken as I don't like fierce heat, but I needn't have worried. The finished dish was warm and fragrant rather than searing although mine looked rather wetter than the book's photo of it. I made a little tomato and cucumber raita to go with it (not in the book).
The book gives a recipe for making paneer but my kitchen doesn't have the space for setting cheese curds aside to drain so I bought some from an Asian supermarket and cooked two recipes. The shahi paneer, or royal Indian cheese, was a fragrant tomatoey casserole that turned the paneer into very soft curds. The shallow-fried paneer chaat really was quick and easy. I will definitely make both these again.
The gosht boti (lamb chops with tomato) were a disappointment, tasting very bland despite the large number of spices. The instructions were also a baffling mess - during the browning of the meat it says to boil off the water, except the water gets added much later.
The Goan fish curry, which I made with king prawns, really hit the mark. Packed with ginger, garlic and chilli and softened with the coconut milk, it soothed the cold I was suffering from. Despite the long list of ingredients, it was simple to assemble and tasted amazing. And it was easy enough that I'd feel confident cooking it without the book on front of me.
All in all, it's definitely a book I'd cook from again especially if I had guests. A big downside is that too many recipes need you to toast whole spices then grind them as part of the cooking rather than something you can do ahead in quantity - that belies the claim of quickness. I've still got a few bookmarked recipes to try and of the five above, I'd make all of them again except the lamb chops.
Monday, 10 December 2012
Dauphinoise potatoes
This is one of my favourite ways to eat potatoes - it's rich, silky, unctuous and garlicky. It takes only 5 minutes to prepare and then you can just forget about it until it's ready. I rarely cook it for myself but it's one of those dishes that's fab when you have guests as it never fails to impress. But I'm currently thinking ahead about a solo Christmas dinner. I've not yet decided what meat to roast (I may just grill a very large steak) but if you're using the oven anyway, then it's worth making a single portion.
Dauphinoise is a bit of a heart attack on a plate if you follow the traditional recipe, so I go for a low-fat version which is just as tasty and creamy but slashes the calorie content. I also like lots of garlic in it.
What you need:
1 large potato
2 cloves of garlic
300ml tub of low-fat crème fraiche
Butter
Salt, pepper
What to do:
Grease a one-portion pie dish with a small amount of butter. Slice the potato very thinly - about 1mm thick. Peel and slice the garlic cloves thinly. Make a layer of potato in the bottom of the dish, season, scatter over half the garlic and spread over half the crème fraiche. Repeat then finish with a final layer of potato. Dot the top with a little butter. Bake at 180C for about an hour.
Cook's tips:
If you want to follow the traditional recipe, just cut one garlic clove in half and rub it round the dish after buttering. Instead of low-fat crème fraiche, use full fat cream. Single is easiest because it pours well, but go for double if you're feeling decadent because it produces the most luxurious version.
A large baking potato is about the right size. I don't bother to peel it myself. The thinner the slices, the quicker they'll cook. Don't test with a knife for "doneness" - use a fork as it's a much better indicator of tenderness. If it's not quite ready after an hour, give it another 15 minutes.
Don't muck around with Dauphinoise too much - it's a simple dish and is best kept simple so resist the temptation to add sliced onions or bacon. At most, a tiny sprinkling of grated gruyère cheese will help to crisp up the top crust and add a little extra depth.
Dauphinoise is a bit of a heart attack on a plate if you follow the traditional recipe, so I go for a low-fat version which is just as tasty and creamy but slashes the calorie content. I also like lots of garlic in it.
What you need:
1 large potato
2 cloves of garlic
300ml tub of low-fat crème fraiche
Butter
Salt, pepper
What to do:
Grease a one-portion pie dish with a small amount of butter. Slice the potato very thinly - about 1mm thick. Peel and slice the garlic cloves thinly. Make a layer of potato in the bottom of the dish, season, scatter over half the garlic and spread over half the crème fraiche. Repeat then finish with a final layer of potato. Dot the top with a little butter. Bake at 180C for about an hour.
Cook's tips:
If you want to follow the traditional recipe, just cut one garlic clove in half and rub it round the dish after buttering. Instead of low-fat crème fraiche, use full fat cream. Single is easiest because it pours well, but go for double if you're feeling decadent because it produces the most luxurious version.
A large baking potato is about the right size. I don't bother to peel it myself. The thinner the slices, the quicker they'll cook. Don't test with a knife for "doneness" - use a fork as it's a much better indicator of tenderness. If it's not quite ready after an hour, give it another 15 minutes.
Don't muck around with Dauphinoise too much - it's a simple dish and is best kept simple so resist the temptation to add sliced onions or bacon. At most, a tiny sprinkling of grated gruyère cheese will help to crisp up the top crust and add a little extra depth.
Wednesday, 5 December 2012
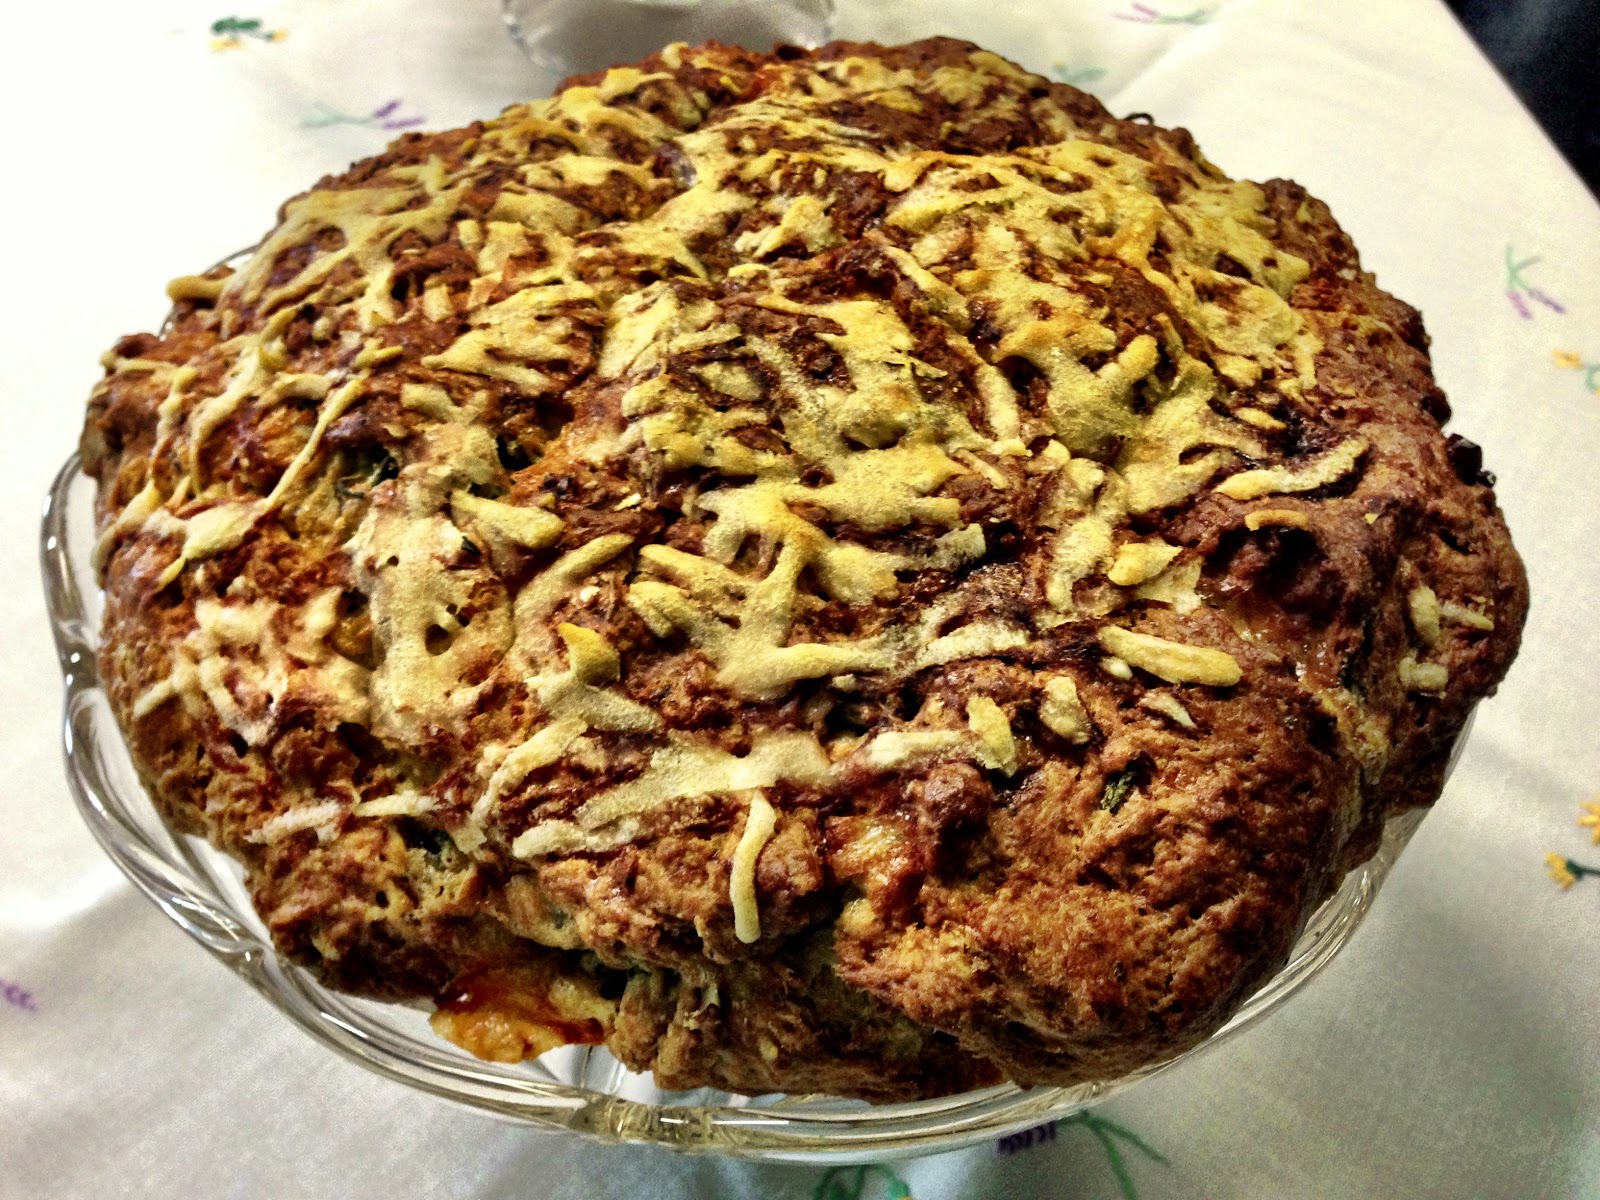
Stilton, rosemary and walnut scone
This almost-cakey slab of savoury carbs is really easy to knock up and the kind of thing I'm likely to bake when I need a supply of snacky stuff to nibble on when I'm working, or as the basis for a lazy supper on a tray in front of the TV.
What you need:
What to do:
Heat the oven to 200C.
Sift the flour and baking powder into a large mixing bowl. Rub the butter into the flour with your fingers - it should look like breadcrumbs. Add the milk and work it in gently until it forms dough. If it is too dry to take up all the flour, add a little more milk. If it's too wet sprinkle in a little more flour. Add the cubes of Stilton, walnut pieces and chopped rosemary. Knead the dough so everything is well distributed.
Line a baking sheet with a piece of baking parchment. Put the scone dough on to it, shape it into a round then flatten it very gently. Score the top into eight and grate a little parmesan over it. Bake for 25 minutes or so - it should be risen and golden.
Cook's tips:
Any blue cheese works really well here - try some gorgonzola or bleu d'Auvergne. Blacksticks Blue is especially tasty here but if you're on a budget a Danish blue is just as good.
I like to tinker with the additions - any good melting cheese can replace the blue. I sometimes add some chopped raw bacon or lardons instead of walnuts. A little very finely diced onion adds a good blast of flavour (sprinkle a little on the top too). Chopped fresh thyme or sage can take the place of rosemary. Sliced black olives also work.
I like to make it in a big round as you can break off as much as you want (keep the rest in a tin or wrapped in foil for later) but you could make individual scones with a cookie cutter - adjust the cooking time to 20 minutes then check on them!
The recipe doubles up really easily, just up the cooking time to 30-35 minutes.
What you need:
250g self-raising flour
1/2 tsp bicarbonate of soda
45g cold butter, cut into small chunks
150ml milk or soya milk
150g stilton, cut into cubes
A sprig of rosemary, leaves stripped off and very finely chopped
6-8 walnut halves, chopped
Parmesan cheese
Heat the oven to 200C.
Sift the flour and baking powder into a large mixing bowl. Rub the butter into the flour with your fingers - it should look like breadcrumbs. Add the milk and work it in gently until it forms dough. If it is too dry to take up all the flour, add a little more milk. If it's too wet sprinkle in a little more flour. Add the cubes of Stilton, walnut pieces and chopped rosemary. Knead the dough so everything is well distributed.
Line a baking sheet with a piece of baking parchment. Put the scone dough on to it, shape it into a round then flatten it very gently. Score the top into eight and grate a little parmesan over it. Bake for 25 minutes or so - it should be risen and golden.
Cook's tips:
Any blue cheese works really well here - try some gorgonzola or bleu d'Auvergne. Blacksticks Blue is especially tasty here but if you're on a budget a Danish blue is just as good.
I like to tinker with the additions - any good melting cheese can replace the blue. I sometimes add some chopped raw bacon or lardons instead of walnuts. A little very finely diced onion adds a good blast of flavour (sprinkle a little on the top too). Chopped fresh thyme or sage can take the place of rosemary. Sliced black olives also work.
I like to make it in a big round as you can break off as much as you want (keep the rest in a tin or wrapped in foil for later) but you could make individual scones with a cookie cutter - adjust the cooking time to 20 minutes then check on them!
The recipe doubles up really easily, just up the cooking time to 30-35 minutes.
Friday, 30 November 2012
Flammekueche
Flammekueche, street food from Alsace, is probably best described as a Franco-German pizza. You won't find any tomato sauce on it, or olives, peppers or any other traditional pizza topping but it's made in the same way - a very thin dough base topped with ingredients then cooked in a very hot wood-burning oven.
The French region of Alsace has historically changed hands with Germany many times, hence the German-sounding name for this dish. The Germans call it flammkuchen, the French tarte flambée, but the Alsatian name is what it's best known by. A while back I discovered that the discount supermarket Lidl sometimes has flammekueche in its freezer section, usually when it has a French promotion, so it's worth having a look there. If I see them, I snap them up quick!
However, it's ridiculously easy to make at home if you cheat. It's absolutely not worth knocking up a batch of pizza dough for one person but if you can get hold of a good quality, ready-made pizza base you can have food on the table in 15 minutes. All you need after that are the toppings - crème fraiche, onions and bacon.
What you need:
An artisan pizza base
Creme fraiche
A small packet of lardons
A small onion, finely diced
Seasoning
What to do:
Heat the oven to 200-220C - if you have time, get it hot well in advance so the heat really has a chance to build up and stay there.
Put the base on a pizza stone and spread it almost to the edge with the creme fraiche - about 3tbsp should be enough for a 12" base. Scatter over the onion and lardons and grind a little black pepper over. Bake in the oven for about 10 minutes.
Cook's tips:
The base needs to be as thin as possible. Anything from a supermarket will be too thick and doughy. The one I used here came from a farmers' market and was handmade. At less than 1mm thick, it was perfect. Check the cooking instructions on the pack but the temperature and time I gave up should be about right. And of course it will depend on the idiosyncrasies of your oven.
If you're using regular bacon, 2-3 slices of streaky cut into 1mm shreds is a good substitute for the lardons.
A classic flammekueche has just the ingredients listed but variations in Alsace include mushrooms or cheese. If you decide to add cheese, don't use cheddar as it goes too gooey - a French-style hard cheese such as Gruyère works best.
The French region of Alsace has historically changed hands with Germany many times, hence the German-sounding name for this dish. The Germans call it flammkuchen, the French tarte flambée, but the Alsatian name is what it's best known by. A while back I discovered that the discount supermarket Lidl sometimes has flammekueche in its freezer section, usually when it has a French promotion, so it's worth having a look there. If I see them, I snap them up quick!
However, it's ridiculously easy to make at home if you cheat. It's absolutely not worth knocking up a batch of pizza dough for one person but if you can get hold of a good quality, ready-made pizza base you can have food on the table in 15 minutes. All you need after that are the toppings - crème fraiche, onions and bacon.
What you need:
An artisan pizza base
Creme fraiche
A small packet of lardons
A small onion, finely diced
Seasoning
What to do:
Heat the oven to 200-220C - if you have time, get it hot well in advance so the heat really has a chance to build up and stay there.
Put the base on a pizza stone and spread it almost to the edge with the creme fraiche - about 3tbsp should be enough for a 12" base. Scatter over the onion and lardons and grind a little black pepper over. Bake in the oven for about 10 minutes.
Cook's tips:
The base needs to be as thin as possible. Anything from a supermarket will be too thick and doughy. The one I used here came from a farmers' market and was handmade. At less than 1mm thick, it was perfect. Check the cooking instructions on the pack but the temperature and time I gave up should be about right. And of course it will depend on the idiosyncrasies of your oven.
If you're using regular bacon, 2-3 slices of streaky cut into 1mm shreds is a good substitute for the lardons.
A classic flammekueche has just the ingredients listed but variations in Alsace include mushrooms or cheese. If you decide to add cheese, don't use cheddar as it goes too gooey - a French-style hard cheese such as Gruyère works best.
Monday, 26 November 2012
Caldo verde
I absolutely love making this Portuguese classic of cabbage, potatoes and spicy sausage - it's a really simple but very nourishing soup that is easy to make and ready in under 30 minutes. This makes 2 portions (it reheats well).
This soup should be quite dense and chunky from the chorizo, kale and potatoes but be held together by a clear broth so it's almost like a casserole.
What you need:
1 small onion, chopped
1 medium to large potato, diced into 1/2cm cubes
1 chorizo sausage, sliced
A very generous handful of curly kale, chopped
1/2 litre of stock
Olive oil
Salt, pepper
What to do:
Sauté the onion in the oil over a medium heat until it turns transparent. Add the chorizo and fry until the fat starts to run off. Pour in the stock and add the potato. Season. Turn up the heat, bring it to the boil and then simmer for 15 minutes. Check the potato is cooked. Add the kale and simmer for another 5 minutes. Dish up.
Cook's tips:
If you can't find kale, use spring greens or savoy cabbage and shred it finely.
If you've got one of those large rings of chorizo, about a third of it should be plenty. You can fry it off separately if it's very fatty and you don't want too much oil in the soup.
I've found that both floury and waxy potatoes work well and I don't bother to peel them unless the skin looks tired. Floury potatoes will start to break down once cooked. Don't overcook them as the liquor should remain clear.
Either vegetable or chicken stock is best. Do go easy on the salt when you season as some brands of stock can be very salty.
This soup should be quite dense and chunky from the chorizo, kale and potatoes but be held together by a clear broth so it's almost like a casserole.
What you need:
1 small onion, chopped
1 medium to large potato, diced into 1/2cm cubes
1 chorizo sausage, sliced
A very generous handful of curly kale, chopped
1/2 litre of stock
Olive oil
Salt, pepper
What to do:
Sauté the onion in the oil over a medium heat until it turns transparent. Add the chorizo and fry until the fat starts to run off. Pour in the stock and add the potato. Season. Turn up the heat, bring it to the boil and then simmer for 15 minutes. Check the potato is cooked. Add the kale and simmer for another 5 minutes. Dish up.
Cook's tips:
If you can't find kale, use spring greens or savoy cabbage and shred it finely.
If you've got one of those large rings of chorizo, about a third of it should be plenty. You can fry it off separately if it's very fatty and you don't want too much oil in the soup.
I've found that both floury and waxy potatoes work well and I don't bother to peel them unless the skin looks tired. Floury potatoes will start to break down once cooked. Don't overcook them as the liquor should remain clear.
Either vegetable or chicken stock is best. Do go easy on the salt when you season as some brands of stock can be very salty.
Friday, 23 November 2012
Rabbit casserole with apple and cider
Rabbit was something I ate regularly during my sojourn abroad - it was fairly easy to find on the butchers' slabs in the Parisian markets and surprisingly easy to buy in Amsterdam's supermarkets. Joy of joys, I've just found a butcher in my city that has them every day - a discovery made purely by chance as I'd actually gone to buy fish because my local fishmonger was inexplicably shut (the butcher and fishmonger in town being next door to each other in an indoor market).
A whole rabbit for £4 was too good to turn down. If you've never eaten it, the meat is white and very lean, has a texture like chicken and a similar but slightly gamier flavour. As there's virtually no fat on it and the meat is well-developed muscle, rabbit is best cooked slowly for 2-3 hours. There's not a lot of meat on one - a small rabbit will feed two people, so for a solo cook that's a portion for dinner now and one to freeze.
The classic pairing in the UK is with apples and cider. In France they cook it with prunes and red wine. It goes well with root vegetables in the pot and mustard is a classic seasoning. Some people add bacon for an extra layer of flavour.
What you need:
1 rabbit, whole or jointed
6 round shallots, peeled but left whole
3 tart apples
2 parsnips
1 turnip
1/2 litre of cider or scrumpy
1 tbsp Dijon mustard
1tbsp grain mustard
A little olive oil
A generous knob of butter
A few sprigs of fresh thyme
Seasoning
What to do:
Heat the olive oil and butter in a casserole on the hob and brown the rabbit on all sides. Cut the parsnips and turnips into chunks, peeling first if the skins look wrinkly and tired. Quarter the apples, remove the core and pips then cut the quarters in half. Add the shallots to the rabbit and sauté them until they start to soften slightly. Put all the veg in the pot, pour in the cider and add the mustard, thyme and a little sea salt and black pepper.
Put it in the oven at 180C for an hour then take it out to check it's not drying out and to taste for seasoning. Turn the heat down to 140C and cook it for another hour. At this stage check it again - the meat should be falling off the bones. If not pop it back in for another half-hour (and top up with boiling water if it looks dry).
Dish up.
Cook's tips:
If you buy a whole small rabbit (around 750g), make sure the butcher guts it for you if it hasn't already been done and to cut it up if you prefer joints. You'll get 4 small joints - 2 hind legs, a torso and the saddle, which is the back and the prize meat.
It's getting increasingly hard to find Bramley apples now. My greengrocer told me he'd stopped stocking them as he couldn't sell them when so many people now buy apple pie instead of making it. Granny Smiths are the way to go as they're the sourest eating apple - he assured me chefs use them to cook with now. Peel if you wish - I prefer to leave the skin on for extra flavour and fibre. If you do find Bramleys, 2 will be plenty.
The root vegetables should be plenty to fill you up, but some celeriac mash on the side is a great accompaniment if you feel inclined and it'll soak up some of the sauce, which will have thickened as the apples collapse.
Don't be alarmed by the amount of mustard - the length of cooking takes the heat out of it, leaving a mellow flavour.
A whole rabbit for £4 was too good to turn down. If you've never eaten it, the meat is white and very lean, has a texture like chicken and a similar but slightly gamier flavour. As there's virtually no fat on it and the meat is well-developed muscle, rabbit is best cooked slowly for 2-3 hours. There's not a lot of meat on one - a small rabbit will feed two people, so for a solo cook that's a portion for dinner now and one to freeze.
The classic pairing in the UK is with apples and cider. In France they cook it with prunes and red wine. It goes well with root vegetables in the pot and mustard is a classic seasoning. Some people add bacon for an extra layer of flavour.
What you need:
1 rabbit, whole or jointed
6 round shallots, peeled but left whole
3 tart apples
2 parsnips
1 turnip
1/2 litre of cider or scrumpy
1 tbsp Dijon mustard
1tbsp grain mustard
A little olive oil
A generous knob of butter
A few sprigs of fresh thyme
Seasoning
What to do:
Heat the olive oil and butter in a casserole on the hob and brown the rabbit on all sides. Cut the parsnips and turnips into chunks, peeling first if the skins look wrinkly and tired. Quarter the apples, remove the core and pips then cut the quarters in half. Add the shallots to the rabbit and sauté them until they start to soften slightly. Put all the veg in the pot, pour in the cider and add the mustard, thyme and a little sea salt and black pepper.
Put it in the oven at 180C for an hour then take it out to check it's not drying out and to taste for seasoning. Turn the heat down to 140C and cook it for another hour. At this stage check it again - the meat should be falling off the bones. If not pop it back in for another half-hour (and top up with boiling water if it looks dry).
Dish up.
Cook's tips:
If you buy a whole small rabbit (around 750g), make sure the butcher guts it for you if it hasn't already been done and to cut it up if you prefer joints. You'll get 4 small joints - 2 hind legs, a torso and the saddle, which is the back and the prize meat.
It's getting increasingly hard to find Bramley apples now. My greengrocer told me he'd stopped stocking them as he couldn't sell them when so many people now buy apple pie instead of making it. Granny Smiths are the way to go as they're the sourest eating apple - he assured me chefs use them to cook with now. Peel if you wish - I prefer to leave the skin on for extra flavour and fibre. If you do find Bramleys, 2 will be plenty.
The root vegetables should be plenty to fill you up, but some celeriac mash on the side is a great accompaniment if you feel inclined and it'll soak up some of the sauce, which will have thickened as the apples collapse.
Don't be alarmed by the amount of mustard - the length of cooking takes the heat out of it, leaving a mellow flavour.
Tuesday, 20 November 2012
Bacon, broad bean and black garlic pasta
I call this 3B pasta and it's really easy to make although it does use three pans. I think it's worth it, though, as the flavours go so well together. It's a store-cupboard dish - I usually have all the ingredients to hand so it's just a case of raiding the fridge and freezer for bacon, broad beans and parmesan, and the larder for pasta and the garlic.
What you need:
Enough dried pasta spirals for one
A small shallot, chopped very finely
A small pack of lardons or a couple of snipped bacon rashers
A handful of broad beans
A bulb of black garlic
Olive oil
Fresh grated parmesan
A knob of butter
What to do:
Peel the garlic and crush the cloves to a paste in a mortar and pestle. Pour in about 3 tablespoons of olive oil, add a pinch of sea salt and work them together to create a dark flavoured oil. (One of those mini worktop food-processors will do an equally good job of blitzing everything together.)
Put the pasta on to cook and the broad beans. While they are boiling, sauté the the shallot in a knob of butter until it turns translucent, then add the lardons and fry until the fat starts to run off. Don't let them caramelise. Keep warm. Drain the beans (about 5 minutes) and pop them out of their skins then add them to the lardons. Drain the pasta when it's al dente (about 10 minutes) and add to the beans and lardons. Mix well, add a tablespoon of the black garlic oil, toss through and put in a bowl. Finish off with some grated parmesan.
Cook's tips:
Black garlic is ordinary garlic that has been fermented - it has a deep, sweet flavour a little like licorice and is very soft. As a flavouring, it's not obviously garlicky at all but it will deliver a huge hit of umami to whatever you add it too. It's quite easy to find it online and a single bulb usually costs £1-1.50. Peel the cloves carefully with your fingers as they will be sticky and squishy.
The leftover oil will keep in a jar for weeks - try adding some to a mushroom risotto, dress a lamb chop with it before grilling or rub it over a chicken prior to roasting. On their own the cloves can be used to flavour dips, add to tapenade, or use in Asian stir-fries.
Much as I love broad beans, I find the skins can be tough sometimes. I won't skin the beans if they are very small but the bigger ones definitely benefit from losing their outer coat. If the beans have been boiled for 4-5 minutes, the skins will slip off very easily. If you're not a fan, use peas instead.
What you need:
Enough dried pasta spirals for one
A small shallot, chopped very finely
A small pack of lardons or a couple of snipped bacon rashers
A handful of broad beans
A bulb of black garlic
Olive oil
Fresh grated parmesan
A knob of butter
What to do:
Peel the garlic and crush the cloves to a paste in a mortar and pestle. Pour in about 3 tablespoons of olive oil, add a pinch of sea salt and work them together to create a dark flavoured oil. (One of those mini worktop food-processors will do an equally good job of blitzing everything together.)
Put the pasta on to cook and the broad beans. While they are boiling, sauté the the shallot in a knob of butter until it turns translucent, then add the lardons and fry until the fat starts to run off. Don't let them caramelise. Keep warm. Drain the beans (about 5 minutes) and pop them out of their skins then add them to the lardons. Drain the pasta when it's al dente (about 10 minutes) and add to the beans and lardons. Mix well, add a tablespoon of the black garlic oil, toss through and put in a bowl. Finish off with some grated parmesan.
Cook's tips:
Black garlic is ordinary garlic that has been fermented - it has a deep, sweet flavour a little like licorice and is very soft. As a flavouring, it's not obviously garlicky at all but it will deliver a huge hit of umami to whatever you add it too. It's quite easy to find it online and a single bulb usually costs £1-1.50. Peel the cloves carefully with your fingers as they will be sticky and squishy.
The leftover oil will keep in a jar for weeks - try adding some to a mushroom risotto, dress a lamb chop with it before grilling or rub it over a chicken prior to roasting. On their own the cloves can be used to flavour dips, add to tapenade, or use in Asian stir-fries.
Much as I love broad beans, I find the skins can be tough sometimes. I won't skin the beans if they are very small but the bigger ones definitely benefit from losing their outer coat. If the beans have been boiled for 4-5 minutes, the skins will slip off very easily. If you're not a fan, use peas instead.
Wednesday, 14 November 2012
Blind dining
No recipe today, but some food for thought.
Yesterday evening, I took part in an event called Dining in the Dark here in Manchester. Along with another 7 or 8 food bloggers, we were there to taste the new menus at the local branch of the Living Room chain. The twist was that we did it blindfolded.
I was confident that I'd be able to identify lots of flavours and ingredients. In fact it was harder than expected. Much harder. Between tastings we could remove our blindfolds and write down what we thought we were eating or drinking (for there were cocktails too). At the end we passed our sheets to our neighbour for marking. I scored a paltry 8.5 out of 40. Even the winner, a very deserving one, managed only 14. (We did have some disagreements with the Living Room about the difference between flavours and ingredients!)
So much of how we eat is visual - we see what's on the plate and we know what to expect. Our tastebuds ready themselves. Even before the food arrives, we've chosen from the menu or, at home, have decided what to cook. There is anticipation.
And then there is smell - our noses also help us to recognise what we are eating, even alerting us when food has gone off. Experts say 90% of what we taste is in fact smell. With the blindfold on, though, I felt like I'd lost not one sense but two - my ability to smell also seemed impaired. And without those, my tastebuds became confused. A coconut and passion fruit crème brulée tasted of the vanilla and sugar I expected with a hint of brandy. How wrong I was.
I did best with the Glamorgan vegetarian sausages above and also the Thai curry.
It was a lot of fun and a stark reminder that eating isn't just about taste. It's about much more - touch and sound also can play a role.
Thanks to the Living Room for their hospitality - I'm more of an "old-fashioned boozer" type of drinker but if you stop by for their food, the new menu is not bad at all.
Yesterday evening, I took part in an event called Dining in the Dark here in Manchester. Along with another 7 or 8 food bloggers, we were there to taste the new menus at the local branch of the Living Room chain. The twist was that we did it blindfolded.
I was confident that I'd be able to identify lots of flavours and ingredients. In fact it was harder than expected. Much harder. Between tastings we could remove our blindfolds and write down what we thought we were eating or drinking (for there were cocktails too). At the end we passed our sheets to our neighbour for marking. I scored a paltry 8.5 out of 40. Even the winner, a very deserving one, managed only 14. (We did have some disagreements with the Living Room about the difference between flavours and ingredients!)
So much of how we eat is visual - we see what's on the plate and we know what to expect. Our tastebuds ready themselves. Even before the food arrives, we've chosen from the menu or, at home, have decided what to cook. There is anticipation.
And then there is smell - our noses also help us to recognise what we are eating, even alerting us when food has gone off. Experts say 90% of what we taste is in fact smell. With the blindfold on, though, I felt like I'd lost not one sense but two - my ability to smell also seemed impaired. And without those, my tastebuds became confused. A coconut and passion fruit crème brulée tasted of the vanilla and sugar I expected with a hint of brandy. How wrong I was.
I did best with the Glamorgan vegetarian sausages above and also the Thai curry.
It was a lot of fun and a stark reminder that eating isn't just about taste. It's about much more - touch and sound also can play a role.
Thanks to the Living Room for their hospitality - I'm more of an "old-fashioned boozer" type of drinker but if you stop by for their food, the new menu is not bad at all.
Tuesday, 13 November 2012
Quick winter minestrone
Soups are currently top of my menu as the weather gets chillier and I crave something substantial, warming and comforting. Soup generally ticks all those boxes for me and this minestrone is especially hearty as well as very simple to make.
Best of all, you can get it into a bowl inside 30 minutes. The other huge bonus is that you probably have most of the ingredients in the larder already.
As usual, prep everything first. This makes two generous bowlfuls and I reckon it tastes as good if not better for reheating next day.
What you need:
1 onion, chopped
1 carrot, finely diced
1 small packet of lardons (optional)
1 litre of vegetable or chicken stock
1 tin of chopped tomatoes
1 small (half-size tin) haricot beans
A handful of small pasta (baby macaroni or orzo)
A generous handful of greens, finely shredded
Pinch of mixed dried herbs
What to do:
Heat a glug of olive oil in a large saucepan over a medium hob and sauté the onion until it starts to soften. Add the lardons if using and fry until the fat starts to run off. Don't brown them or let the onions start to caramelise. Add the carrot, stir through for half a minute then pour in the stock, the tomatoes, the beans and the pasta. Season to taste and add the herbs.
Bring the pan to the boil then turn down the heat and simmer for 5 minutes. Add the greens and simmer for another 5 minutes until the pasta is cooked to al dente. Dish up!
Cook's tips:
Although minestrone is a chunky soup, the greens do need to be finely shredded - I aim to cut them as thin as Chinese "seaweed", which is actually made from cabbage, because they need to cook quickly. Most greens work well - spring greens, kale, cavolo nero and savoy cabbage all suit minestrone.
You can throw pretty much any veg into a minestrone as it's a seasonal soup that makes the most of what's available. If you don't have carrots to hand, use a parsnip, turnip or some celeriac. Use whatever beans you have to hand in the store cupboard - borlotti, cannelini and pinto, for example.
The basis of minestrone is vegetarian - any meat (or meat stock) is entirely optional. Bacon definitely suits this best if you want meat because of the depth of flavour it brings - use snipped-up rashers if you don't have lardons, or some chopped leftover ham or gammon.
You can finish the soup in the bowl with a teaspoon of pesto swirled through if you like (not my personal preference as I find it too overpowering) or a little grated parmesan or pecorino.
Best of all, you can get it into a bowl inside 30 minutes. The other huge bonus is that you probably have most of the ingredients in the larder already.
As usual, prep everything first. This makes two generous bowlfuls and I reckon it tastes as good if not better for reheating next day.
What you need:
1 onion, chopped
1 carrot, finely diced
1 small packet of lardons (optional)
1 litre of vegetable or chicken stock
1 tin of chopped tomatoes
1 small (half-size tin) haricot beans
A handful of small pasta (baby macaroni or orzo)
A generous handful of greens, finely shredded
Pinch of mixed dried herbs
What to do:
Heat a glug of olive oil in a large saucepan over a medium hob and sauté the onion until it starts to soften. Add the lardons if using and fry until the fat starts to run off. Don't brown them or let the onions start to caramelise. Add the carrot, stir through for half a minute then pour in the stock, the tomatoes, the beans and the pasta. Season to taste and add the herbs.
Bring the pan to the boil then turn down the heat and simmer for 5 minutes. Add the greens and simmer for another 5 minutes until the pasta is cooked to al dente. Dish up!
Cook's tips:
Although minestrone is a chunky soup, the greens do need to be finely shredded - I aim to cut them as thin as Chinese "seaweed", which is actually made from cabbage, because they need to cook quickly. Most greens work well - spring greens, kale, cavolo nero and savoy cabbage all suit minestrone.
You can throw pretty much any veg into a minestrone as it's a seasonal soup that makes the most of what's available. If you don't have carrots to hand, use a parsnip, turnip or some celeriac. Use whatever beans you have to hand in the store cupboard - borlotti, cannelini and pinto, for example.
The basis of minestrone is vegetarian - any meat (or meat stock) is entirely optional. Bacon definitely suits this best if you want meat because of the depth of flavour it brings - use snipped-up rashers if you don't have lardons, or some chopped leftover ham or gammon.
You can finish the soup in the bowl with a teaspoon of pesto swirled through if you like (not my personal preference as I find it too overpowering) or a little grated parmesan or pecorino.
Subscribe to:
Posts (Atom)